
How I Made My Raspberry Pi 1 Usable Again
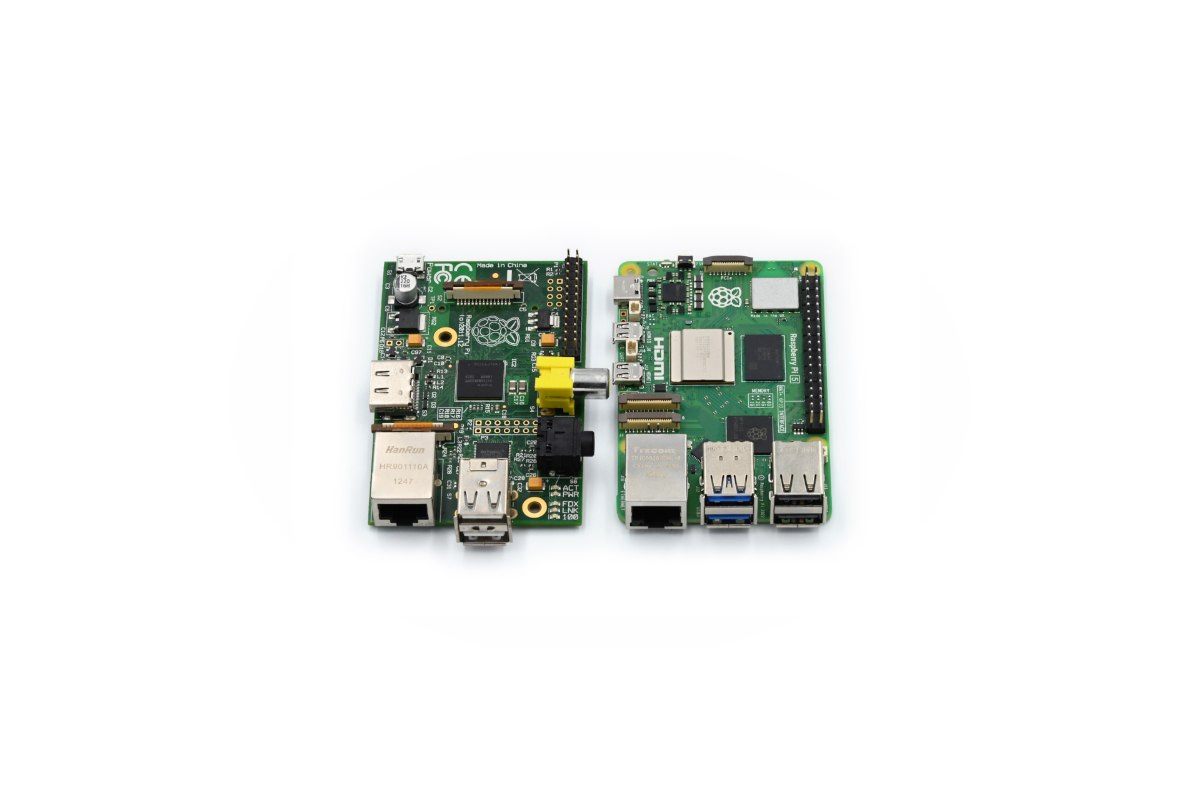
Raspberry Pi 1 is a single-board computer that was released in 2012. It was a revolutionary device at the time, but it has since been surpassed by newer models. However, I decided to take on the challenge of making my Raspberry Pi 1 usable again.
What Are The True Specs of Raspberry Pi 1?
| Feature | Specification |
|---|---|
| RAM | 512MB |
| CPU | 700MHz single-core ARM1176JZF-S |
| GPU | Broadcom VideoCore IV |
| Network | 10/100 Ethernet, NO Wi-Fi |
As you can tell, not a lot to work with! However, I was determined to make it work.
What Did I Have Planned For It?
Reviving the Raspberry Pi 1 wasn’t just a fun little project. I had plans to use it within my school.
Since I had experience with the Pi 5 (by using it for emulation of games up to the Nintendo Gamecube era), I knew I could push the limits of a first generation Raspberry Pi.
By getting a request from some students for a bus stop information system, I started to wish for this feature in my school too. There was a system showing the bus stops in a nice interface a year prior, but it was shut off without explanation. They even took down the whole TV! After my school got a new TV, it was turned off almost all the time.
And then I stepped in. But my plans were beyond just a simple bus stop showing website.
How Exactly Did I Implement It?
I instantly saw the potential of using a Raspberry Pi in general. At first, I thought of using a Pi 3, and I quickly put together a Python script that opens tabs from a list of URLs in a browser and cycles through them every x amount of time. This was a great start, but I wanted to do more.
Since modern browsers (like Chromium) are capable of rendering PDF files and images, an idea of marketing new events in the school came to mind. The website showing bus stops was already up and handled with live data by the town that I live in, Vilnius. And making the PDF files was definitely more than possible.
However, the one and only issue I encountered with a Raspberry Pi 3 was that I was afraid of leaving it overnight, and the thought that I could use it at home, where I need at least as decent of a processor as the 3rd generation Pi’s and Wi-Fi, couldn’t let me sleep. Then I found a Raspberry Pi 1 in my drawer, and I thought to myself: Why shouldn’t it work?
Technical Barriers
The answer to my Why shouldn’t it work question was simple: the Raspberry Pi 1 is a very weak device. It has a single-core CPU and only 512MB of RAM. This means that it can only handle a limited amount of tasks at once, and it can easily become overwhelmed.
One of many tasks it was slow at was browser rendering. Handling a display in general was a challenge. With only a Wayland or X11 compositor, it still couldn’t run a browser at all. Not even because of speed, but unsupported set of CPU instructions!
I thought I wouldn’t waste any time and just get my Raspberry Pi 3 back to action. But in that case, this blog post wouldn’t exist.
OS Choice
First I tried Raspbian. It worked great on the Pi 3, but the Pi 1 was a different story. Startup times could reach several minutes. Since systemd wasn’t forgiving, I tried Alpine Linux. I was using it for all my Docker containers, and to my surprise, it fit here too!
I wasn’t aware of the RAM-first philosophy of Alpine Linux. That caused more problems than answers.
First Problem - Transferring and Keeping Files Not Deleted
With this one I had many options, of which I probably picked the worst one. I flashed Alpine Linux onto the SD card of my Raspberry Pi 1, but it was partitioned with free and unclaimed space in the rest of the SD card, where OS wasn’t installed. Furthermore, mounting files when the OS boots up is a bit of a pain. Though I figured I could bind-mount folders with content to /home/raspi.
But my biggest issue was writing everything by hand, and the longer the line gets, the more time I spend.
Later I found out that the proper way was to install Alpine Linux FROM a USB drive treating the SD card as a storage device, and that would’ve probably worked way better (I hadn’t tested it yet).
Second Problem - Drivers and Display
The Raspberry Pi 1 didn’t want to display any video. Turns out, it’s a matter of changing a couple of command line parameters to define the exact resolution Pi 1 can handle.
The TV I was setting up somehow had negative margins applied with no in-TV settings to change that, and I had to compensate for it. Took a while, but good old forums helped me out a ton.
Third Problem I Found Later When Rendering - How to Escape To The Shell?
The escape button doesn’t escape, even when I make the script explicitly do that. I could’ve probably just installed a GUI terminal emulator with a keybind to open it, but instead I made sure the Pi gives me some time after a boot while I get to the TTY2 console, if needed.
Web Scraping and Rendering
Surprisingly, the official Vilnius bus stops web app handled real-time data through a simple API. This meant that with some reverse-engineering I could retrieve the data and render it myself without the bloat of a heavy JavaScript engine that browsers run on.
A Bit About the API
At first, for me to operate with the API, I had to see all the stops available. Thankfully enough, every stop and related stops (at the other side of the street) are available at:
https://www.stops.lt/vilnius/vilnius/stops.txt
Next, I had to look up all the names of the stops. The big text file also includes a nice reference at the top of what the data means:
ID;Direction;Lat;Lng;Stops;Name;Info;Street;Area;City
Luckily, we only need the ID (for the stop itself), Stops (for related stops) and Name (for human-readable identification) fields. Rest I could simply omit.
Then, to make use of the parsed data, I had to somehow get real-time departures. When I looked back at what the official site fetches, I found out that it was a simple GET request:
https://www.stops.lt/vilnius/departures2.php?stopid=STOP_ID
It returns information about a specific stop for each soon departing bus:
- Bus type: bus, nightbus, expressbus, etc…
- Bus number: 1, 2, 3 and so on…
- Departure time: Time passed since midnight in seconds at when the bus is expected to depart next. Strange choice of format, but it works.
- Destination: The name of the destination’s final stop. This is a human-readable string, so it can be used as-is.
Only thing left is rendering the result in a nice way. That same Python script was used.
To render, it draws an image using pillow library, and blits it onto the screen with tkinter. The script is set to run in a loop, and it fetches the data every 10 seconds by default. This is more than enough for a bus stop information system, and highly efficient too.
Since I’m using image blitting, I can render any additional images, creating a slideshow of school events + bus stop information.
How the Interface Looks Like

NOTE: I used mock data which is not accurate to real-world stop data.
Conclusion
It was a very nice side project. Not only did I learn how to reverse-engineer an API, but also how to optimize old technology. In the end, our school’s IT guy got mad about this over Security concerns, because my personal Raspberry Pi was connected to school’s internet.
He didn’t want to believe me that it wasn’t sending anything over, so I had to replace the old Raspberry Pi with a newer one. It’s connected to the school’s Wi-Fi to not raise any suspicion.
Having said that, I don’t regret a single minute of work I put in. Besides, I can always reuse the same material, even on different hardware, so it’s a win-win!